Dune Awakening has officially released, and of course, you are going to want to travel to virtual Arrakis with your friends. This guide will give you a breakdown of how to connect with your friends and the best ways to make sure your experience together in the game is optimal.
Link Your Funcom Account
The first thing you need to do is make sure your Steam and Funcom accounts are connected. From the main menu click on the Account button at the bottom right of the screen. You can also use shortcut keys listed below.
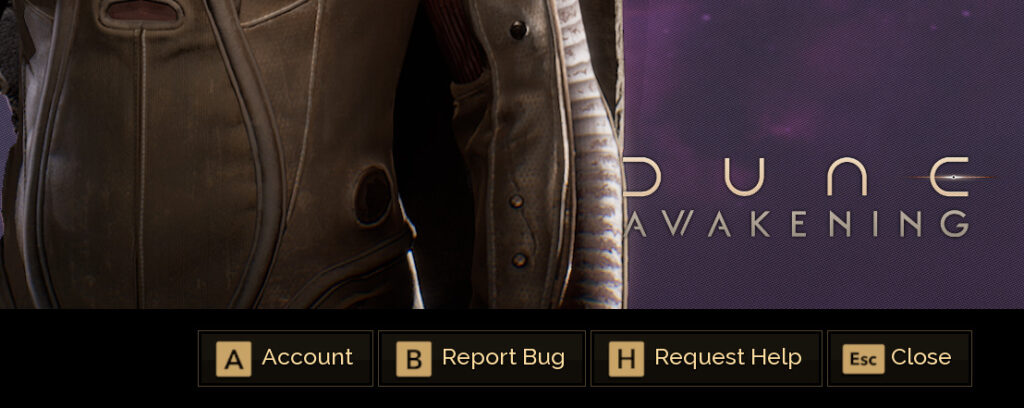
Keyboard + Mouse – A
Xbox Style Controller – View (or Select as we know it as) button
DualShock or DualSense – Options Button (Press the touchpad as a button)
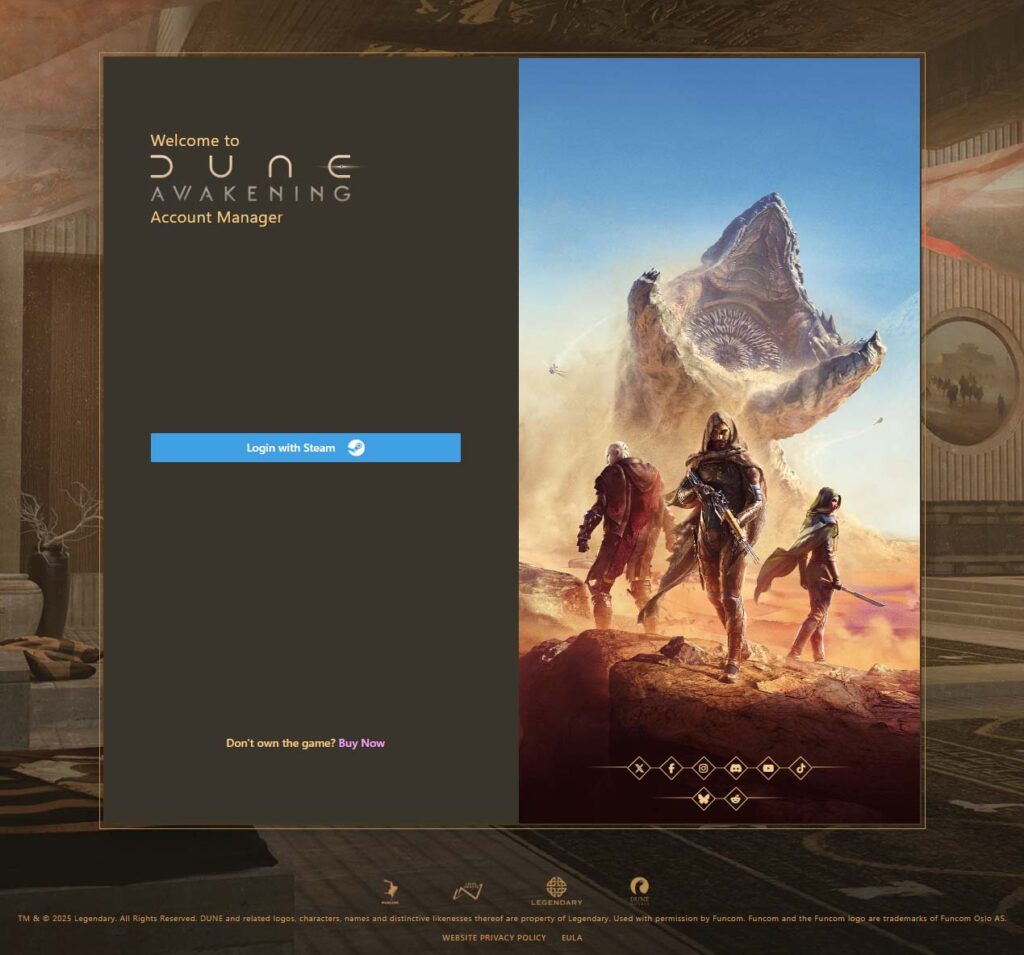
Funcom’s site will ask you to login to their site with your steam account. Follow whatever steps the site says to follow to link your Steam account to the game. With the game only on Steam at this point, you will want to make sure that anybody you play Dune: Awakening with is your friend on Steam.
Getting on the Correct Server
Now that your accounts are linked, so is your friends list. You will be able to easily see which friends are in which servers. Dune Awakening is broken down into Worlds that contain Servers. The game’s menus and UI do a very good job of showing you which Worlds and Servers your friends have characters in.
The very first time you start up the game you will be presented with an option to Play or one to browse the Servers. Make sure you click on the Servers button.
Dune Awakening Auto-Detects your Region, so the first step is to make sure your game is set to the same region your friends are in. Sometimes your friends are in a different region than yours. At the bottom left of the Servers screen is the regions menu. Below are the button shortcuts to access the Region menu.
Keyboard+Mouse – C
Xbox Style Controller – Y
DualShock or DualSense – Triangle
The different regions in Dune Awakening are:
- Asia
- Europe
- North America
- Oceana
- South America
Once your correct region is selected and confirmed, you will see that there are 4 submenus in the Servers menu: OFFICIAL, FRIENDS, RECENT, PRIVATE.
For a public server choose the FRIENDS tab and for a private server choose PRIVATE. (Private servers are pay only through 3rd party companies GPortal, Nitrado, and XRealm).
Choosing the FRIENDS submenu should shorten the Worlds list significantly. If you have a lot of friends playing the game or you choose the PRIVATE submenu, you will want to make sure you sort by the FRIENDS column. When you do this, the number of friends you have in that World should appear under that column.
Once you have the correct World, you will want to click the caret at the right side next to the ping bars to open the list of servers in that world.
As with most friends, you should have been given the name of the World/Server your friends are in. However, the servers all start with the word Sietch, so make sure you are choosing the correct one with the friends you are trying to join in it.
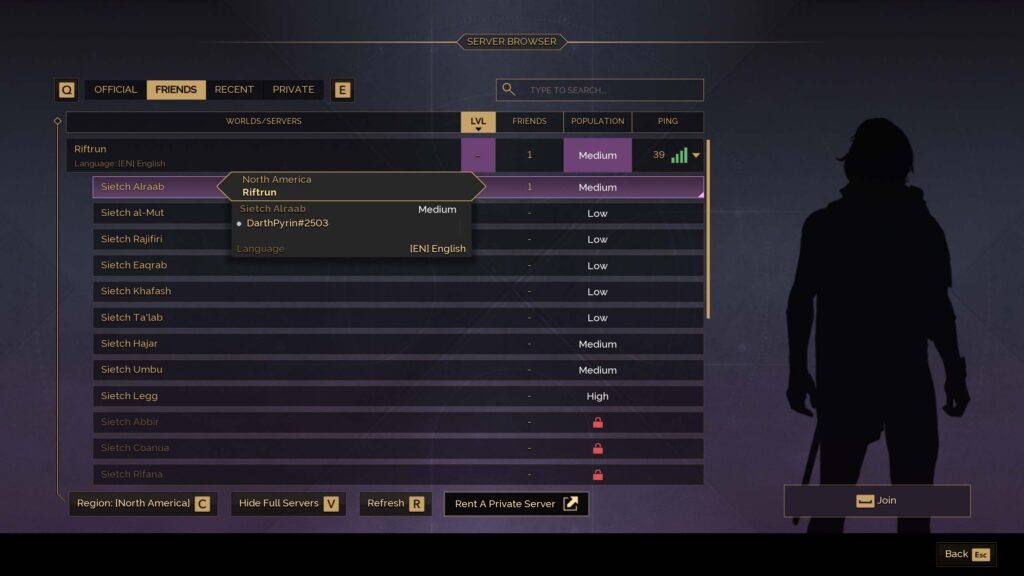
If you hover your cursor over the Server a popup appears that lists which friends are in that server.
You know what to do next – Join the Server and create your character.
Partying Up
Before you can play with friends you are required to play through a short set of Introduction missions. You will know when this mission chain is over when you first encounter the Shai Hulud, i.e. the Sandworm.
Now that you are in the same Server as your friend, you need to be able to actually play with your friends. Dune: Awakening’s quests, called Journeys, has a system that allows certain parts of quests to be completed by anyone in your active party.
You can tell in the quest description which ones they are by a Party icon next to that particular part of the quest, with a corresponding footnote which states Completable by a party member.

Once you and your friends are online together, you will need to Party up. Head to the Social menu which can be accessed by clicking the SOCIAL button, which appears at the bottom of every subsection of the Player Menu. The Player Menu is accessed by pressing shortcut keys while in the game world.
Keyboard + Mouse – TAB
Xbox Style Controller – View (or Select as we know it as) button
DualShock or DualSense – Options Button (Press the touchpad as a button)
You should now be on the PLAYERS screen. On Keyboard + Mouse, you can press P to quickly get to the PLAYERS screen.
Next you will want to make sure your friend is online. They should appear under the ONLINE (SAME SERVER) list and not under the ONLINE (OTHER) list.
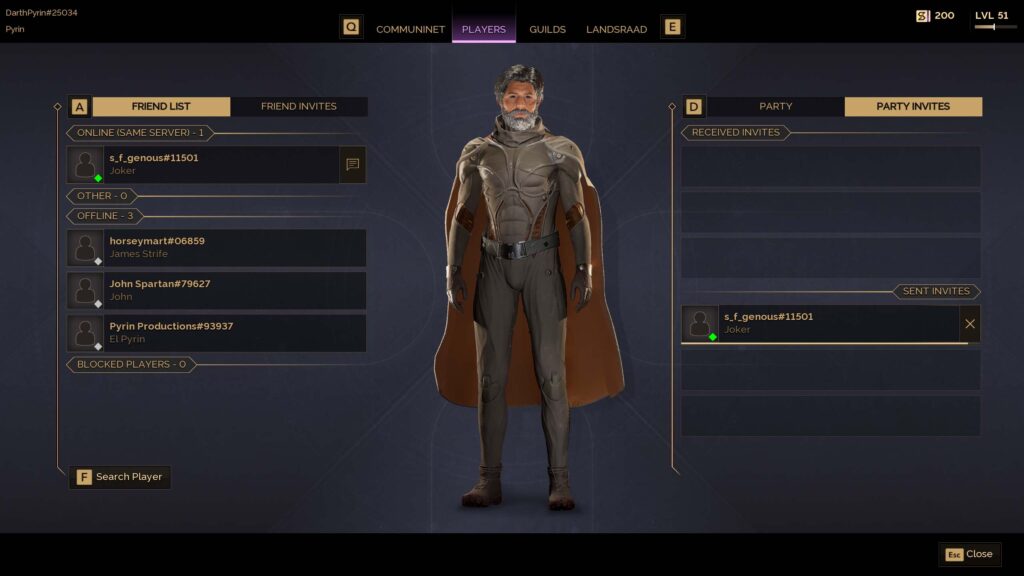
Click the Party Invite button, which is the far right button next to the player name. Invites will pop up on the player’s screen when they are out of the menus and in the world. The invite can also be found in the PLAYERS menu under the PARTY INVITES tab.
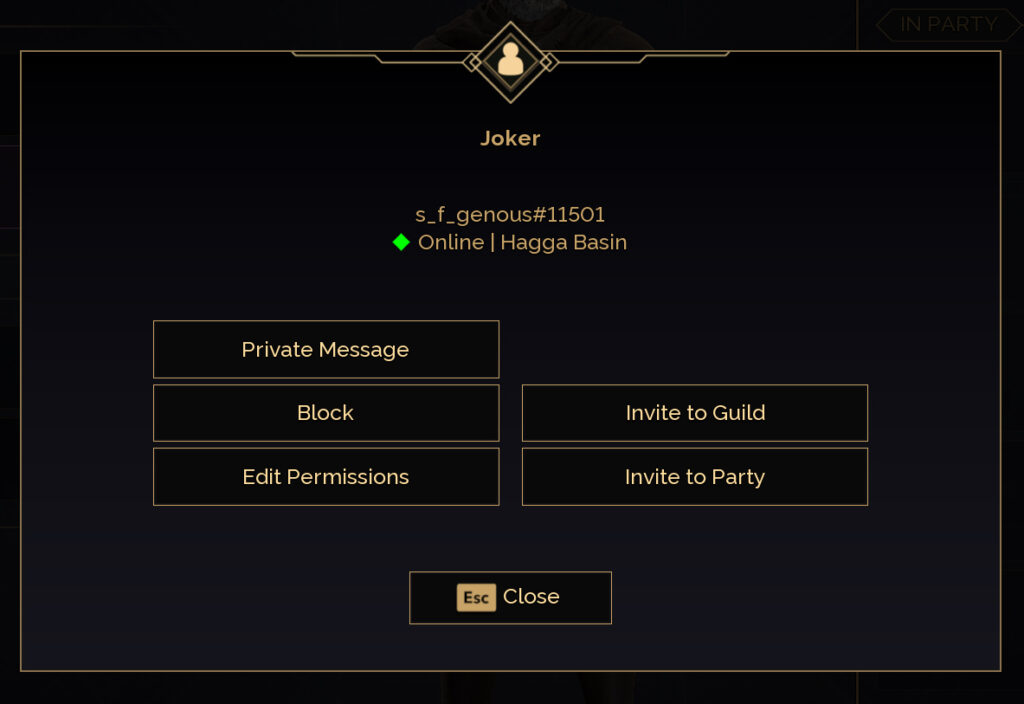
The second way to invite the player to a party is by clicking on their name in the PLAYERS menu. A Player card will pop up and you which contains an Invite to Party button.
Another invite method is done in the world via the Interact With menu. This can be accessed by focusing your cursor dot on the other player and pressing the shortcut key listed below and selecting Invite to Party
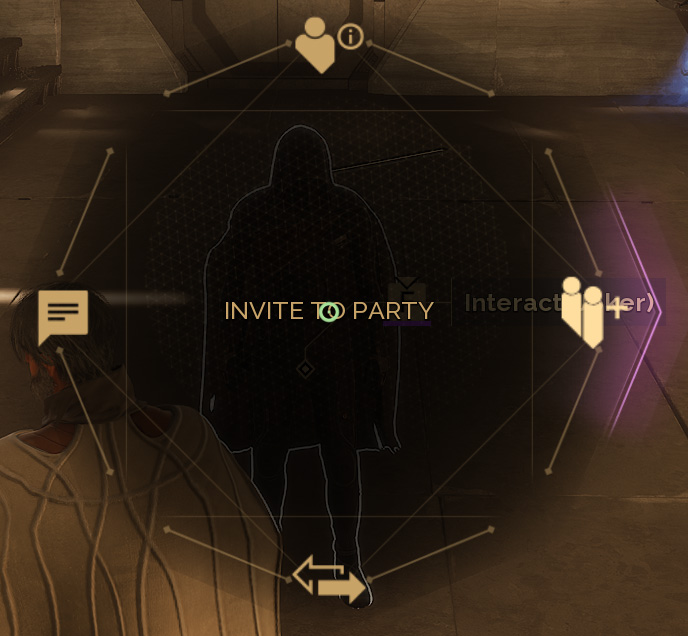
Keyboard+Mouse – Hold F
Xbox Style Controller – Hold X
DualShock or DualSense – Hold Square
Guilds
A big part of Dune Awakening is GUILDS. It cost 1000 Solari to form a GUILD.
The GUILDS menu is found in the SOCIAL menu. See above on how to access the SOCIAL screen. On Keyboard + Mouse, the GUILDS menu shortcut is the letter O.
This menu is how you create your GUILD.
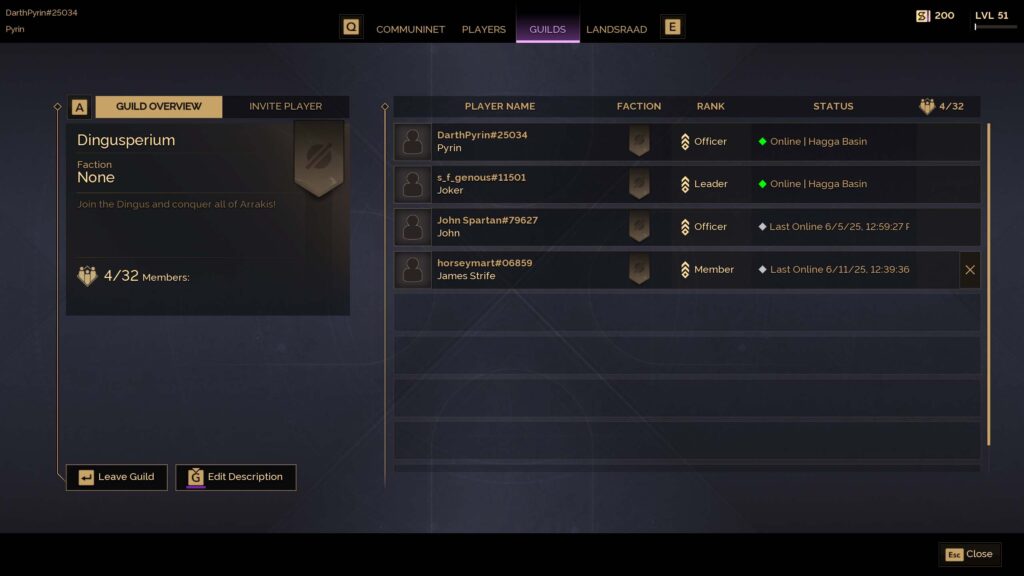
Once created you can invite other players by going to the INVITE PLAYER tab in the GUILDS screen and type in their Steam name or character name. You can also invite players via some of the same methods you invite a player to a party.
In the PLAYERS screen, you can invite players to your GUILD via the Player Card or in the world via the Interact With menu (see above how to access those).
If you are the one being invited to a GUILD, then this is the menu you go into to find the invite. If you are in the world at the time of the invite, it will also pop up on your screen just like a PARTY INVITE would.
Permissions
The last aspect this guide will cover is PERMISSIONS. There are 5 levels of PERMISSIONS: OWNER, CO-OWNER, ASSOCIATE, GUILD, PUBLIC.
If you want to give someone access to your vehicle, building in your base, or anything in it, you will need to change the permissions on that particular item in its MANAGE menu
To access the MANAGE menu there are shortcut keys:
Keyboard+Mouse – Hold F
Xbox Style Controller – Hold Y
DualShock or DualSense – Hold Triangle
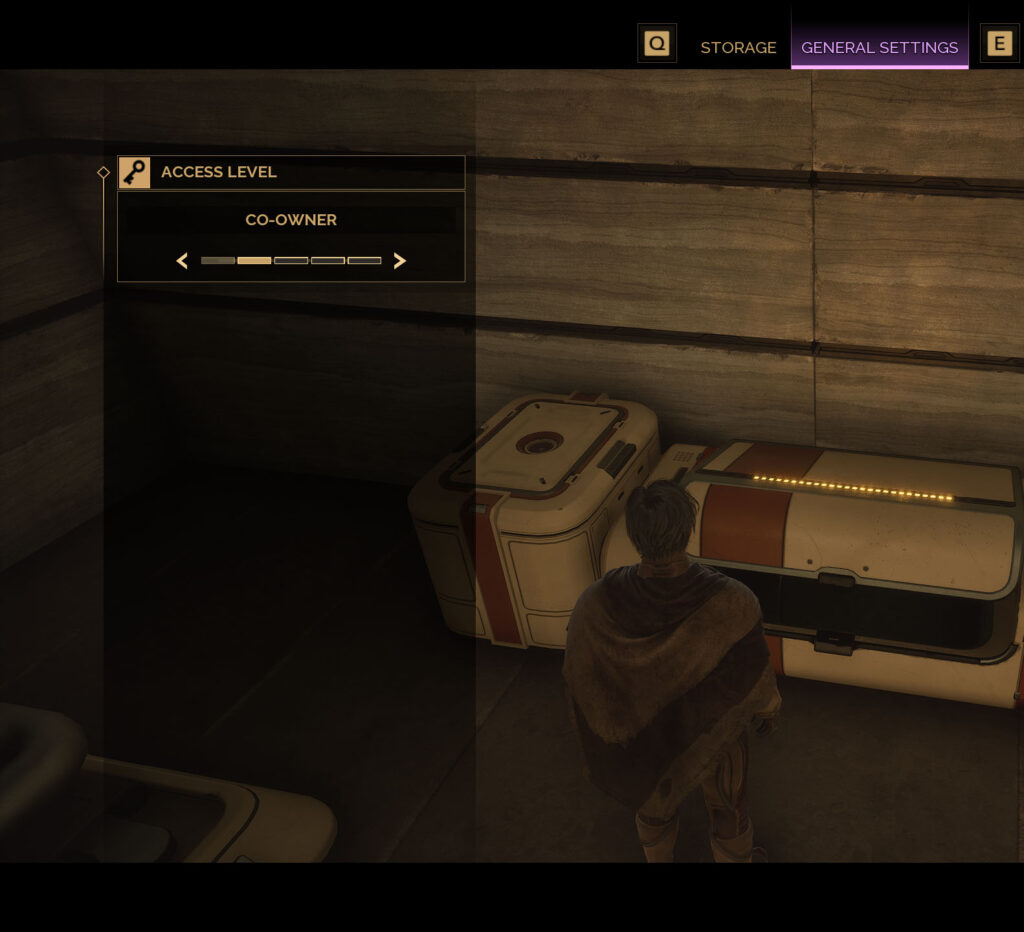
These shortcuts are how you access the PERMISSIONS settings for anything in your base.
The SUB-FIEF CONSOLE is how you set PERMISSIONS for that whole base. When you access the MANAGE menu for your console, you can edit the level of anyone on your friends list for that base. This will update every door, storage container, plus Crafting and Utility Workbenches.
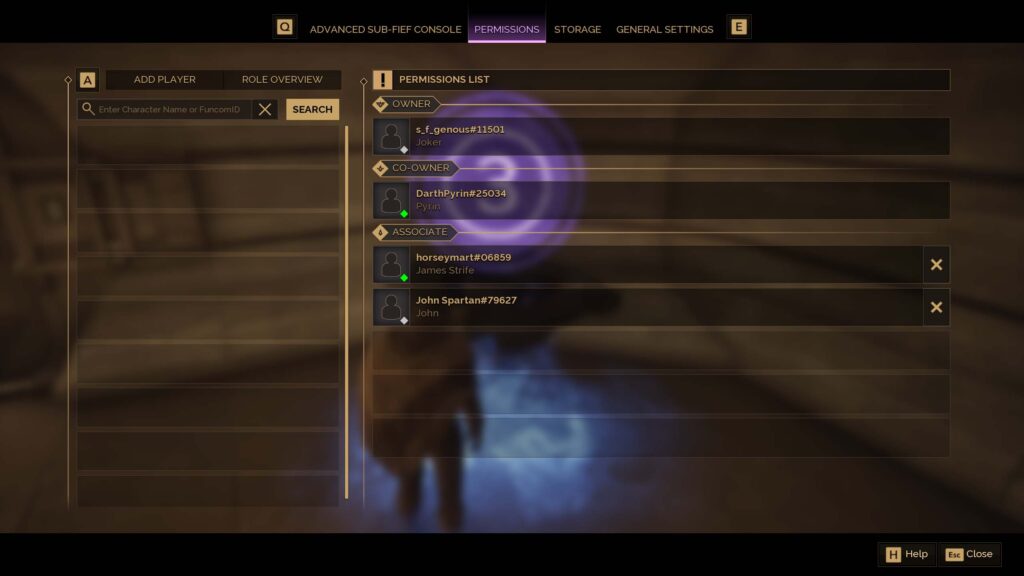
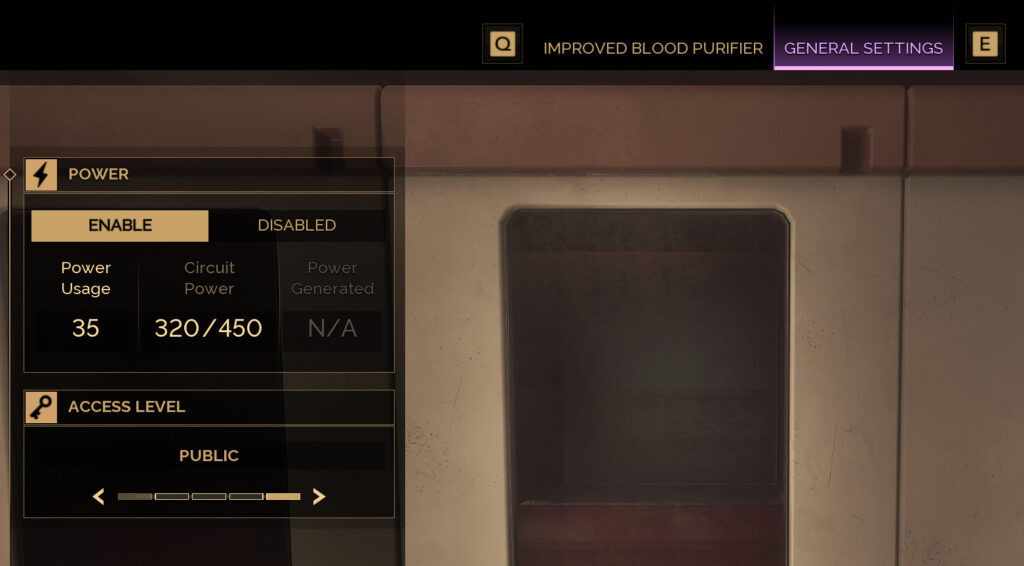
You can also change the permission level of a particular door, Storage Container, or Crafting and Utility Workbench. Say you want to put a public blood purifier outside. You can make just that blood purifier PUBLIC.
For Vehicles, this shortcut menu will bring up a radial wheel. From here you will need to go to MANAGER VEHICLE and then to the KEY symbol, which is the PERMISSIONS menu for vehicles.
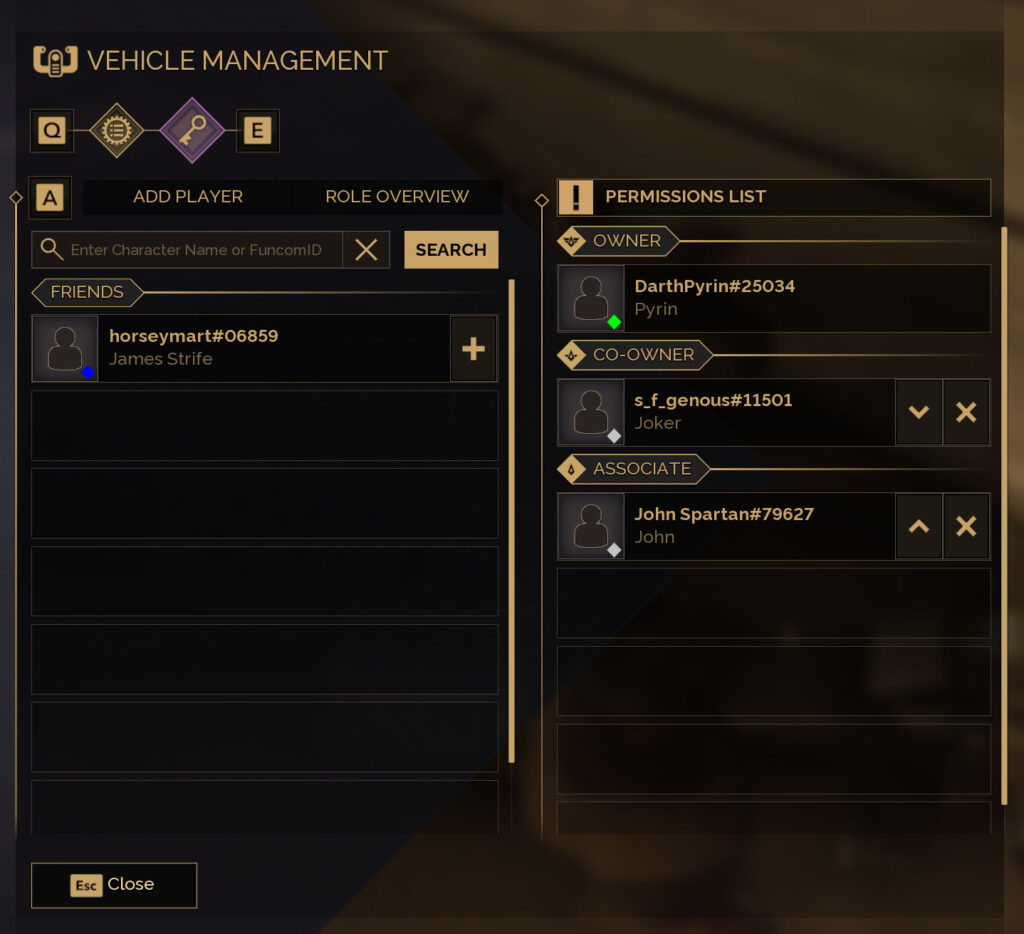
If you want to change the PERMISSIONS of a particular friend, you can do so via the EDIT PERMISSIONS menu in their PLAYER CARD. (See above on how to access PLAYER CARDS).
Once you have PERMISSIONS set then building, crafting, and storing, all your hard-earned resources and loot can be streamlined into one base.
You are now ready to play Dune: Awakening with your friends. If you have not picked up your copy of the game, head over to their website or go directly to Steam and pick up your copy today. And before you go, check out our guide on How to Meet a Sandworm…and Survive.

